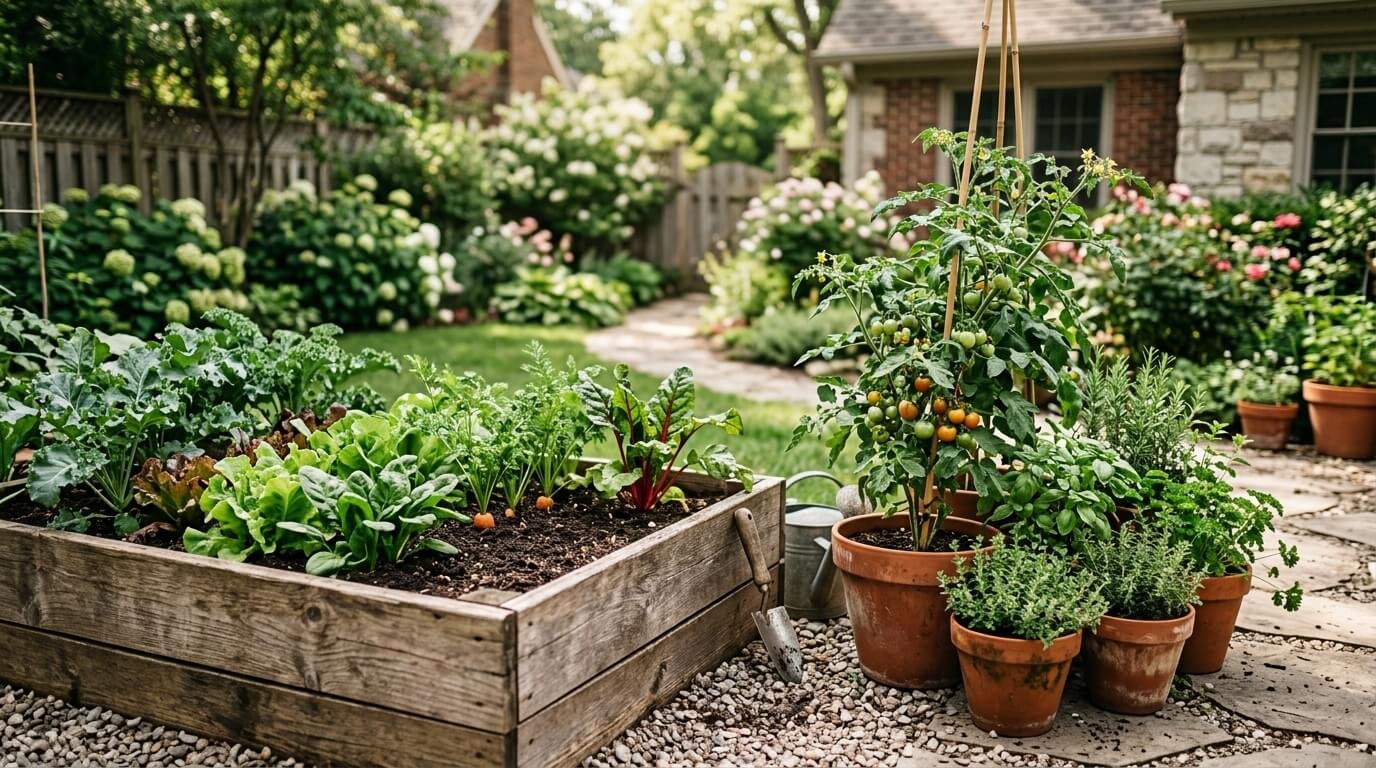

If you’ve ever brought home a gorgeous pot of mums in September, only to watch it turn brown and crispy by Halloween, you’re not alone — and it’s usually not your fault. Learning how to care for mums really comes down to a handful of fixable habits: buying the right plant at the right time, using the right pot, and knowing what to do once the weather turns.
This guide walks through the whole lifecycle — picking a good plant, keeping it happy through the season, and, if you want, getting it to come back next year.
Quick Answer: Mum Care at a Glance
If you need the basics before you head to the store, here’s the short version:
- Light: Full sun, 6+ hours a day
- Water: Check the top inch of soil — water when it’s dry, never let the plant fully wilt or sit in standing water
- Pot: Go 2–4 inches wider than the nursery pot, with drainage holes
- Deadhead: Pinch off spent blooms weekly
- Fall: Protect from hard freezes; light frost is fine
- Winter: Only hardy varieties, planted in the ground with mulch, have a real shot at surviving
- Annual vs. hardy: Annual mums are decor — enjoy them, then compost them. Hardy mums can be planted in-ground and may return next year in zones 5–9 (some cultivars to zone 3).
That last point changes almost every other decision you’ll make, so let’s start there.
Annual vs. Hardy Mums: Which Do You Have?
Not all mums are built the same, and the tag on the pot usually won’t say so. Here’s how to tell what you actually bought.
Annual (florist) mums are bred for one thing: maximum color, fast. They’re grown in greenhouses, pushed into bloom on a schedule, and have shallow root systems that aren’t built to survive winter. If you picked up a mum from a grocery store display or a big-box store in a thin plastic pot, it’s almost certainly this type. Treat it like a really nice bouquet that happens to be alive — enjoy it for 6–8 weeks, then let it go.
Hardy (garden) mums — sometimes labeled “perennial mums” or sold under cultivar names like Mammoth — have deeper root systems with underground runners. Planted in the ground with enough lead time before frost, these can survive winter in USDA zones 5–9, and some cold-hardy cultivars bred for northern climates are rated as low as zone 3. They usually cost a bit more and are sold at independent nurseries rather than grocery stores.
A friend of mine once planted a $6 grocery store mum directly into her garden bed in October, expecting it back the following spring. It never returned — that plant was an annual with roots too shallow for a Midwest winter. A hardy variety, planted in August instead of October, would have had a real chance.
Before you do anything else, ask the nursery staff or check the plant tag which type you have. It determines whether you’re decorating for a season or investing in a perennial.
How to Choose a Healthy Mum at the Store
The plant you pick up has already decided a lot of its own fate — pick the wrong one and no amount of care afterward will save it.
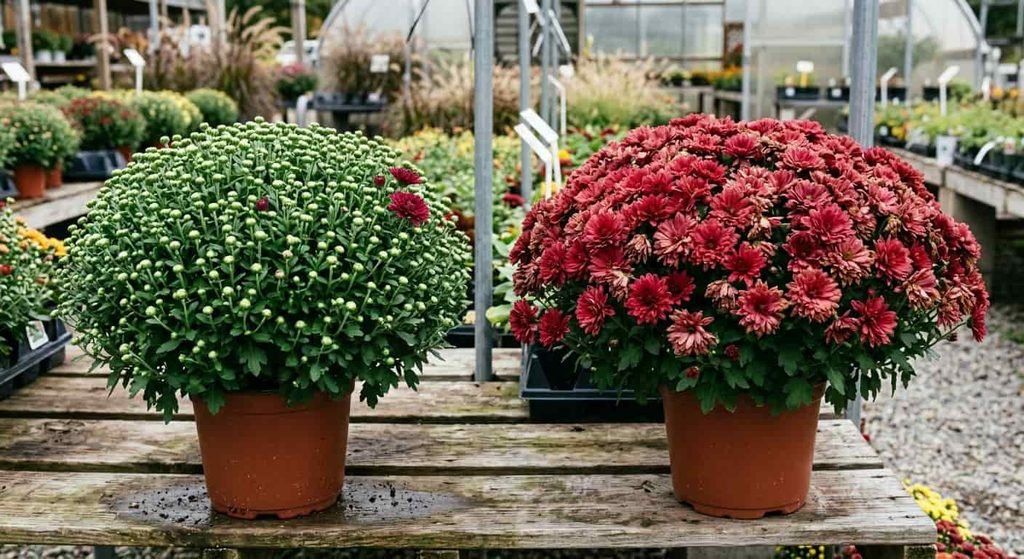
Look for tight, unopened buds, not a plant already in full bloom. It’s tempting to grab the one that looks like a firework in the pot, but that plant is closer to the end of its life than the beginning. A mum covered in tight green buds with just a few open flowers has weeks of color still ahead of it.
Check the foliage. Dense, deep-green leaves are a good sign. Yellowing or sparse leaves suggest the plant has been sitting on a truck or sales floor too long.
Buy local when you can. Mums trucked in from out of state are often stressed by the trip and haven’t acclimated to your climate. A locally grown mum is used to your actual weather, which matters once the first cool night hits.
Don’t buy too early. If you buy mums in late August because the display looks tempting, you’re buying a plant that thinks it’s already supposed to be blooming — and it’ll fade before fall decorating season even gets going. Wait until nighttime temps are consistently in the 60s or below.
How to Care for Mums in Pots (or Any Container)
Almost every mum you buy has outgrown its nursery pot by the time it gets to checkout. If you’re wondering how to care for mums in a pot long-term rather than just displaying them as-is, repotting is the first real step.
Size up, but not by too much. Move into a container 2–4 inches wider in diameter than the one it came in. Go bigger than that and the extra soil holds more water than the roots can use, setting you up for root rot. As a rough rule of thumb, a single mature mum needs at least a 12-inch-diameter pot to have enough root room for the season.
Drainage holes are non-negotiable. If a decorative pot doesn’t have one, keep the plant in its nursery pot and slip that inside the decorative one instead of planting directly into a pot with no way for water to escape.
Use a well-draining potting mix, not garden soil. Garden soil compacts in containers and suffocates roots. Mums also prefer slightly acidic soil, around pH 6.0–6.5 — most bagged potting mixes are already in this range, so this only matters if you’re amending soil yourself.
To repot: gently loosen the root ball with your fingers (matted roots need to be encouraged to spread, not left alone), place it in the new pot at the same depth it was growing before, backfill with potting mix, and water thoroughly right away.
Planting hardy mums in the ground works the same way, timing aside: get them in the soil 6–8 weeks before your area’s average first frost date, in a hole twice as wide as the root ball and no deeper than the plant was sitting in its pot — planting too deep is a common cause of stem rot.
Watering Mums the Right Way
Watering is where most mums actually die, and it’s rarely because people forget — it’s because they overcorrect or can’t tell under- and overwatering apart.
Do the finger test. Stick a finger into the top inch of soil. Dry? Water. Still damp? Check again tomorrow.
Water deeply, not frequently. A quick splash on top wets the surface but never reaches the roots. Water slowly at the base until it runs out the drainage holes — that’s how you know it actually got there.
Wilting can mean either problem, which is the tricky part. An underwatered mum wilts because there’s no moisture left to keep the leaves upright. An overwatered mum wilts because rotting roots can no longer take up water at all. The soil test tells you which: dry soil means water it (it should perk up within an hour), while soggy soil with wilting leaves means a rot problem that more water will only worsen.
Use a saucer, and empty it. A saucer under the pot catches runoff and helps keep the root ball evenly moist. But if there’s still standing water in it the next day, dump it out — mums sitting in a puddle for days head toward rot.
Sunlight and Placement
Mums are sold as full-sun plants, and that’s true — 6+ hours of direct sun daily is ideal. There’s a seasonal wrinkle worth knowing, though.
Fall sun is weaker and shadows are longer than they were in July. A patio spot that was blazing hot all summer might only get partial sun by late September as the sun’s angle drops. If your mum looks stretched out or isn’t blooming well, check whether a once-sunny spot has quietly gone shadier.
In hot climates, afternoon shade can extend bloom life. If you’re still hitting the upper 70s or 80s in early fall, a few hours of relief from harsh afternoon sun can keep blooms from fading as fast.
Indoors, place mums in a south- or west-facing window for the brightest available light — even then, expect them to last only 2–4 weeks indoors compared to months outdoors, since indoor light and airflow can’t fully match what they get outside.
Deadheading and Light Pruning
Deadheading is simple, but it’s the step people skip because it feels unnecessary. It isn’t.
Pinch off spent blooms and any stems that have browned or gone mushy, cutting back to the next healthy leaf or bud, about once a week during bloom. It keeps the plant tidy and directs energy toward buds still waiting to open.
One honest caveat: for annual mums, deadheading won’t trigger new blooms — you’re extending the good-looking window of what’s already there. For hardy mums grown long-term, regular deadheading does support better overall bloom production through the season.
A technique most guides skip entirely: if you’re growing a hardy mum from spring through fall rather than buying one pre-grown in September, pinch back new growth by about an inch every few weeks from late spring through early July. This forces branching instead of leggy upward growth, giving you a bushier plant with more blooms by fall. Stop pinching by mid-July so the plant has time to set buds before cool weather arrives.
Fertilizing Mums
Fertilizer needs depend on which type of mum you have and what you’re trying to get out of it.
For a general boost during active growth, a balanced fertilizer diluted to half strength, applied every 2–3 weeks, works well.
Stop fertilizing once buds start forming. This is the step people miss. Continuing heavy nitrogen feeding once a mum is budding tends to produce weak, floppy stems that flop over under the weight of the blooms.
If you bought a mum already in bud or bloom — which is most mums purchased in September — you don’t need to fertilize much at all. Commercial growers have already fed it heavily to get it looking good; your job is just to keep it watered. Save active fertilizing for hardy mums you’re growing yourself from spring onward.
How to Care for Mums in the Fall
Fall is when most people actually own a mum, and it’s also when the weather starts working against you. A few adjustments make the difference between a mum that fades by mid-October and one that holds color into November.
A light frost (temperatures briefly dipping to around 32°F) generally won’t hurt the blooms. Mums are a fall flower for a reason — they handle cool nights better than most annuals.
A hard freeze is different. If temperatures are dropping well below freezing for an extended stretch, cover outdoor mums with a light frost cloth or old bedsheet overnight, or move potted mums into a garage or covered porch temporarily.
Keep an eye on watering as temperatures drop. Cooler air means slower evaporation, so a mum that needed water every two days in September might only need it every four or five by late October. Go back to the finger test rather than sticking to a fixed schedule.
If you plan to overwinter a hardy mum, don’t rush into winter prep at the first cold snap — the goal is a slow transition into dormancy, which is covered next.
How to Care for Mums in the Winter (Overwintering)

This is the step that trips up almost everyone, and it’s the part most mum-care guides gloss over. If you want a hardy mum back next spring, here’s the actual process.
Don’t cut it back right after the first frost. It’s tempting to tidy up dead-looking foliage immediately, but that top growth — even brown and unattractive — insulates the crown through early winter. Wait until after several hard freezes, once the foliage has fully died back, usually in late fall.
Cut stems back to about 4–6 inches above the soil line, not all the way to the ground. This stubble traps snow and leaves around the crown for extra insulation.
Mulch heavily — pile 3–4 inches of shredded leaves, straw, or bark mulch over the crown after cutting back. This is the single biggest factor in winter survival; mums that die over winter usually froze at the root, not from cold air on the leaves.
Potted mums have a much harder time surviving winter than in-ground ones, because a container doesn’t insulate roots the way surrounding earth does. If you want to overwinter a mum that’s still in its pot, either sink the whole pot into the ground up to its rim (borrowing the soil’s insulation) or move it into an unheated garage or shed, where it won’t freeze solid but also won’t be fooled into growing by indoor warmth.
In spring, don’t give up on it too early. Hardy mums are often slower to show new growth than other perennials. Scratch a stem gently with a fingernail — green underneath means it’s alive and just taking its time.
Common Mum Problems and How to Fix Them
Yellowing leaves. Almost always a watering issue in one direction or the other. Check the soil — bone dry means underwatered, consistently soggy means overwatered. Adjust and give it a few days.
Leggy growth with few flowers. Usually not enough sunlight, or too much nitrogen fertilizer pushing leafy growth over blooms. Check whether the spot has gotten shadier, and ease off the fertilizer.
Wilting despite regular watering. The scary one, because the instinct is to water more, which can make it worse. If you can, gently tip the pot and check the roots: black, mushy, bad-smelling roots mean rot from overwatering (badly rotted plants often can’t be saved, but cutting back water and improving drainage is the only shot). White, healthy roots with bone-dry soil just mean underwatering — a deep soak should perk it up within hours.
Dropping buds before they open. Usually stress-related — heat, drought, or pests. Make sure watering has been steady over the past week or two, and check for pest activity.
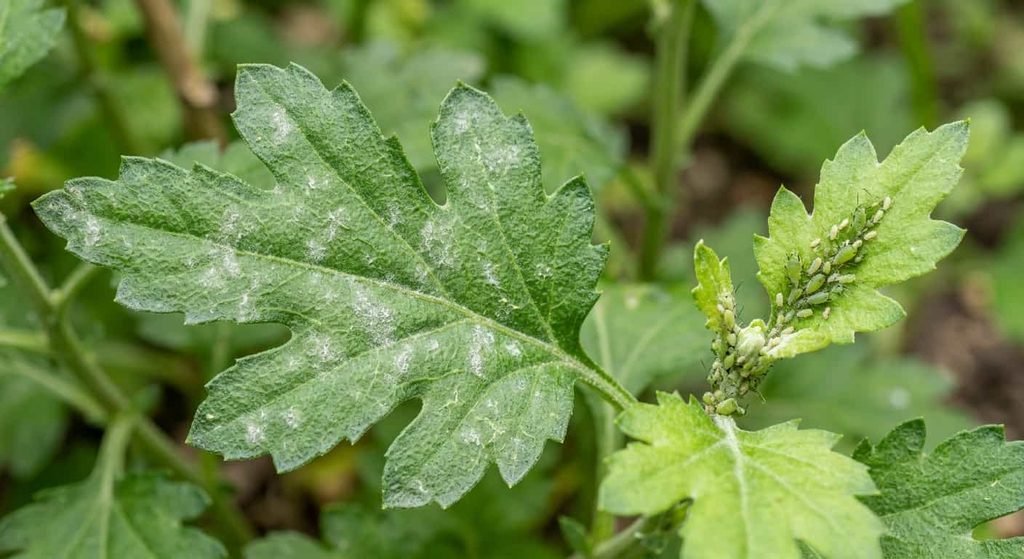
Pests to watch for. Aphids (small, clustered on new growth and buds) and spider mites (tiny, causing stippled or dusty-looking leaves with fine webbing) are the most common. A strong spray of water knocks off light infestations; insecticidal soap handles more persistent ones.
Powdery mildew or leaf spot. White powdery patches or dark spots usually mean poor air circulation combined with wet foliage. Water at the base instead of overhead, give plants room to breathe, and remove badly affected leaves.
Displaying Mums Around Your Home
Once you’ve got a healthy mum, the fun part is putting it to work.
Porches and entryways are the classic spot — a pair of mums flanking your front door instantly signals fall, and their rounded, dense shape pairs well with the straight lines of a doorway.
Pair mums with pumpkins, ornamental kale, or grasses for a fuller display rather than a lone pot. A cluster of varying heights reads more intentional than a single plant sitting by itself.
Bringing mums indoors works fine for short stretches — a dinner party, a weekend of company — but treat it as temporary. Indoor bloom life runs 2–4 weeks compared to months outdoors, so it’s better as an occasional accent than a permanent indoor plant.
FAQs
How do you care for mums in pots so they last as long as possible?
Repot into a container 2–4 inches wider than the nursery pot with good drainage, water deeply when the top inch of soil is dry, and place in full sun. Potted mums generally won’t last as long as in-ground ones, especially through winter, since containers don’t insulate roots the way soil does.
Can mums survive winter in pots?
It’s difficult but not impossible. Hardy varieties have a much better shot than annuals, and even then, sinking the pot into the ground or moving it to an unheated garage improves the odds significantly compared to leaving it exposed outdoors.
Do mums come back every year?
Only hardy (perennial) varieties, and only if planted in the ground early enough — 6–8 weeks before first frost — and given proper winter protection. Annual/florist mums won’t survive winter regardless of care.
How long do potted mums last?
Outdoors with good care, 4–8 weeks or longer. Indoors, expect closer to 2–4 weeks due to lower light and warmer, drier air.
Should I cut mums back after they bloom?
Not right away. Wait until foliage has died back from repeated hard frosts, then cut stems to about 4–6 inches above the soil line — that stubble helps insulate the crown over winter.
Can I keep mums alive indoors long-term?
Not easily. Mums are outdoor, full-sun plants by nature, and most indoor environments don’t provide the light or temperature range they need. Treat indoor placement as short-term display rather than a permanent home.