
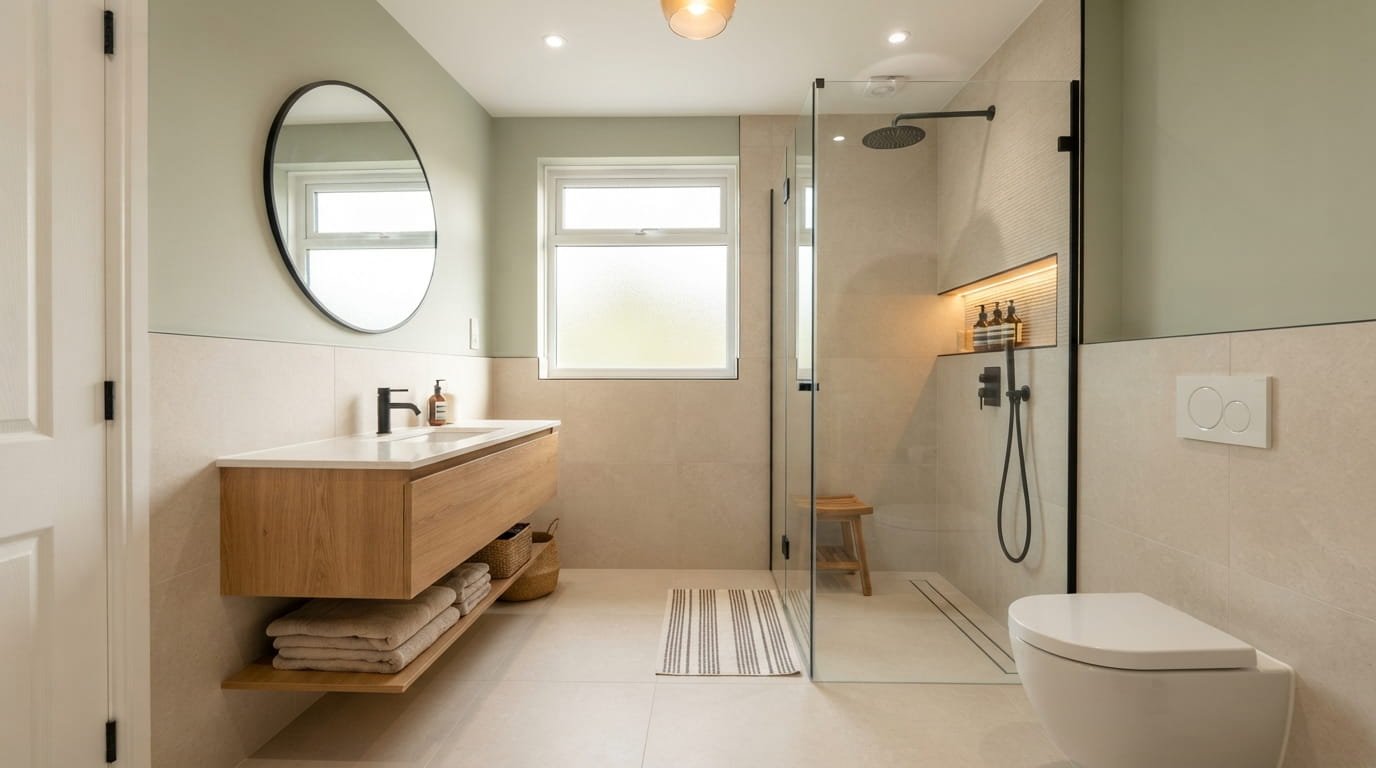
Small bathroom renovation ideas can transform a tight, outdated space into a luxurious, highly functional spa retreat—even within a footprint measuring just 35 to 50 square feet.The answer lies in smart luxury a design strategy that pairs space-saving structural fixtures with intelligent layouts, elevated finishes, and uninterrupted light.
Whether you are executing a full gut remodel or a targeted budget makeover, eliminating visual barriers and optimizing vertical storage can transform a cramped room into a high-functioning sanctuary.
Planning Your Layout: Clearances, Codes, and Sightlines
Before selecting tile samples or vanity finishes, evaluating the physical boundaries of your floor plan is critical. A small space quickly becomes frustrating if fixture placement violates basic clearance guidelines or building codes.
| Clearance Parameter | NKBA Minimum Requirement | Recommended Ideal | Why It Matters |
| Toilet Centerline | 15 inches from wall/obstacle | 18 inches | Prevents a cramped feeling when seated. |
| Front Walkway Space | 21 inches clear space | 30 inches | Ensures comfortable walking and door operation. |
| Shower Interior Size | 30 x 30 inches | 36 x 36 inches | Allows full arm movement without hitting walls. |
| Vanity Height | 32 inches | 34 – 36 inches | Reduces back strain (“comfort height”). |
The Psychology of Unbroken Sightlines
In small room design, visual volume matters just as much as square footage. When your eye can track continuous flooring from the entry threshold all the way to the back wall, your brain perceives the room as larger.
Bulky vanity bases, raised shower thresholds, and wide door swings slice up a small room into tiny visual zones. Removing these obstacles creates the feeling of an expansive retreat without knocking down a single stud.
15 Smart Luxury Small Bathroom Renovation Ideas
1. Install a Floating, Wall-Mounted Vanity
Traditional floor-mounted cabinets block light and cut off floor tile, drawing immediate attention to a room’s tight perimeter. A floating vanity exposes the flooring underneath, instantly increasing perceived floor space.
- Design Strategy: Choose a model with deep divider drawers rather than open cabinet doors. Shallow, wide drawers maximize storage around the sink’s drain trap.
- Execution Tip: Mount the vanity 34 to 36 inches above the floor and extend your main floor tile beneath it all the way to the back wall.
2. Transition to a Curbless Walk-In Shower
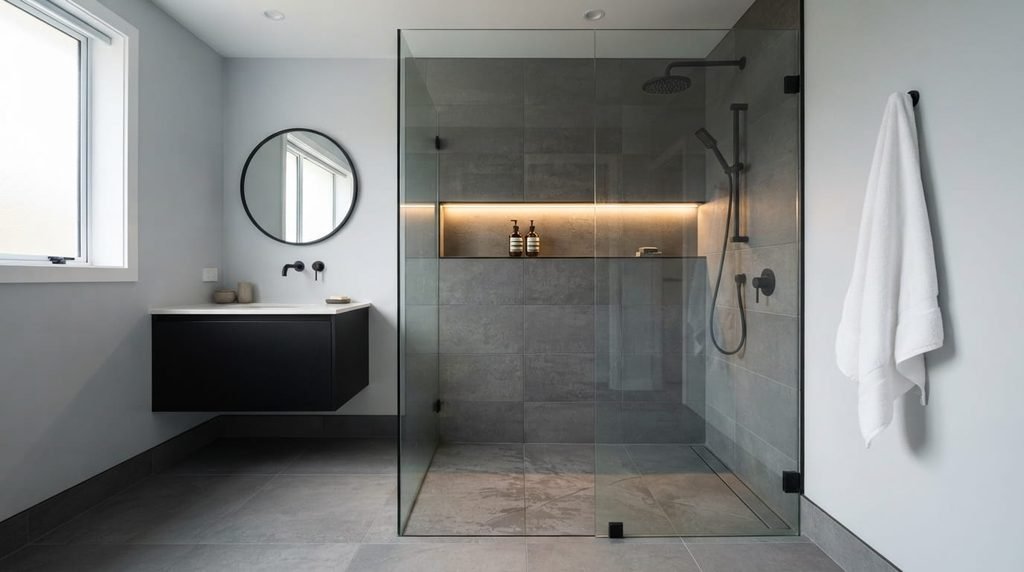
Shower curbs create a physical step and a visual partition that fragments small bathroom layouts. Removing the curb allows your floor tile to flow continuously into the shower enclosure.
- Technical Requirement: Curbless entries require lowering the shower subfloor framing or using a low-profile waterproof tray (such as a Schluter system) sloped toward a linear drain.
- Luxury Impact: Paired with a single glass panel, a continuous tile floor gives your bathroom an elegant, open hotel suite feel.
3. Extend Large-Format Tile Floor-to-Ceiling
Using tiny 2×2-inch tiles across all walls creates a dense grid of grout lines that can make small rooms look busy. Extending large-format tiles up to the ceiling draws the eye upward and creates a sleek, continuous surface.
- Material Choice: Select 12×24-inch or 24×48-inch porcelain slabs. Porcelain is durable, water-resistant, and significantly easier to maintain than natural stone.
- Pro Tip: Match your grout color closely to the tile shade to minimize seam visibility and create a smooth, slab-like look.
4. Use In-Wall Faucets to Reclaim Counter Space
Standard deck-mounted faucets require 3 to 5 inches of vanity depth behind the sink basin. In-wall faucets shift the valve assembly inside the wall cavity, allowing for a much shallower vanity.
| Feature | Deck-Mounted Faucet | In-Wall Mounted Faucet |
| Min. Vanity Depth Needed | 18 – 22 inches | 12 – 15 inches |
| Countertop Cleanability | Harder to wipe around base | Completely clear surface |
| Rough-In Complexity | Standard under-sink plumbing | In-wall valve installation |
5. Recess Storage Between Wall Studs
Standard wall studs are spaced 16 inches apart on center, leaving a 3.5-inch deep hollow cavity behind the drywall. Converting these unused spaces into recessed storage preserves precious floor and wall space.
- Applications: Install recessed medicine cabinets with mirrored interiors, built-in shower niches, or recessed toilet paper holders.
- Design Detail: Tile the interior of recessed wall niches with accent tiles or solid stone sills to match your shower trim.
6. Upgrade to a Tankless Wall-Hung Toilet
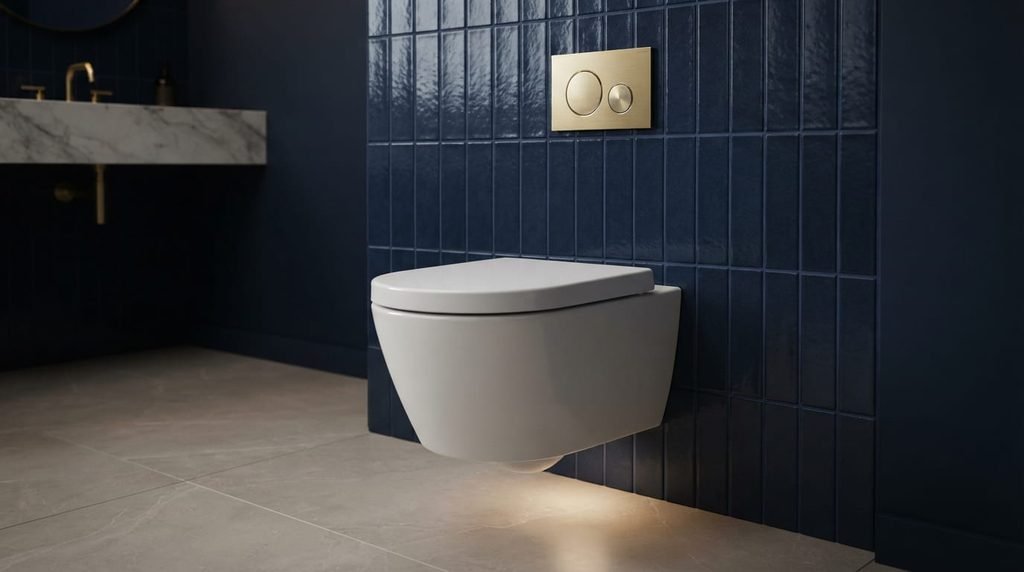
Conventional floor-mounted toilets extend 28 to 30 inches into the room, with bulky porcelain tanks cluttering sightlines. A wall-hung toilet conceals its mounting frame and dual-flush tank inside the wall cavity.
- Space Savings: Reclaims up to 8 to 10 inches of room depth, providing valuable legroom in narrow layouts.
- Maintenance: Elevating the bowl off the ground makes mopping the floor fast and effortless.
7. Install Frameless Glass Panels
Heavy shower curtains and thick framed doors block light and chop your space in half. Clear glass lets light pass through unimpeded, revealing the full depth of the room.
- Glass Specification: Use 3/8-inch (10mm) tempered clear glass treated with a protective coating to prevent hard water spots and mineral buildup.
- Layout Trick: If space prevents a swinging glass door, opt for a single fixed glass splash screen or a sliding barn-style glass door.
8. Layer Low-Profile Architectural Lighting
A single overhead ceiling fixture casts harsh shadows down your face and makes corners look dim. Layered lighting adds warmth, depth, and functional illumination.
- The Three-Tier Lighting Plan:
- Ambient: Dimmable 3000K recessed ceiling LEDs for overall room warmth.
- Task: Vertical wall sconces mounted at eye level on both sides of the mirror to eliminate shadows.
- Accent: Concealed LED strip channels beneath vanities or inside shower niches for a gentle nighttime glow.
9. Switch to a Pocket Door or Sliding Hardware
A standard 30-inch interior door swinging into a small bathroom consumes nearly 9 square feet of usable floor space, often restricting where you can place vanities or towel bars.
- Pocket Door Conversion: Sliding the door into the wall frame completely frees up interior wall space.
- Alternative: If plumbing or wiring inside the wall prevents a pocket door, install top-hung exterior sliding barn door hardware with a frosted glass panel for privacy.
10. Choose High-Reflectance Monochromatic Palettes
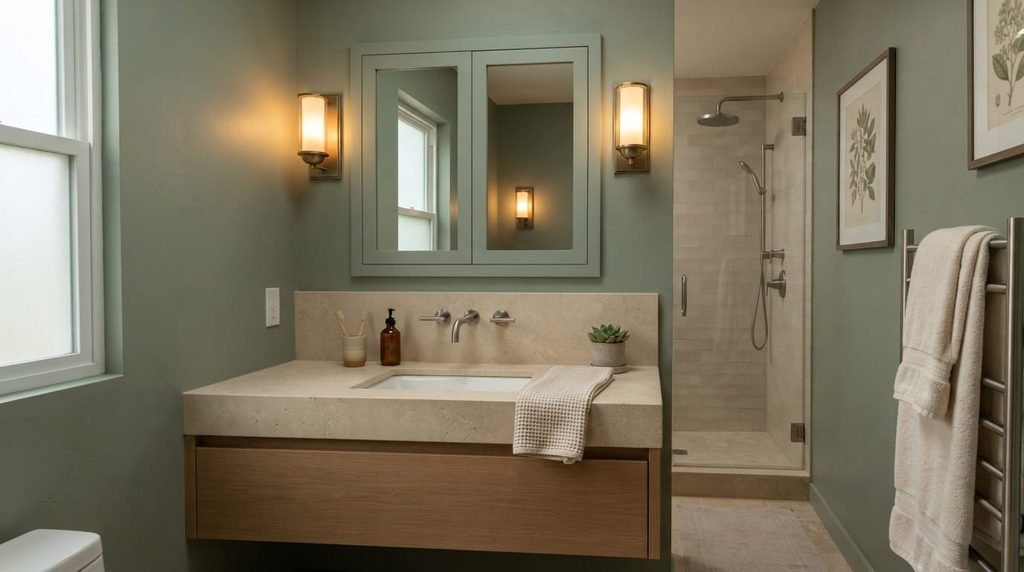
High-contrast color schemes break up small spaces into visually jarring sections. Using a cohesive, low-contrast palette helps surfaces blend naturally together.
- Reflectance Strategy: Soft off-whites, greiges, and warm pale greys bounce light gently around the room without cold glare.
- Adding Texture: Instead of high-contrast colors, build visual interest using fluted cabinet fronts, matte metal hardware, or subtle stone graining.
11. Add Electric Radiant In-Floor Heating
Baseboard heaters and wall radiators steal valuable wall space in small bathrooms. Electric floor heating mats eliminate the need for bulky heating units while adding everyday luxury.
- Installation: Ultra-thin heating cables embedded directly in the thinset mortar beneath floor tile add minimal height to your floor profile.
- Smart Control: Programmable smart thermostats heat the floor right before your morning routine, keeping energy consumption low.
12. Build a Continuous Linear Shower Niche
Instead of a small, cramped square niche that barely holds two bottles, run a horizontal linear niche across the entire length of your shower wall.
- Proportions: Align the top and bottom edges of the niche with major tile grout lines to maintain clean geometric alignment.
- Accent Lighting: Incorporate a waterproof, low-voltage LED strip along the top lip of the niche for soft accent lighting.
13. Choose Integrated Sinks and Custom Stone Tops
Traditional undermount or drop-in sinks take up significant counter space. An integrated sink—molded seamlessly from quartz, porcelain, or solid surface material—delivers a sleek, easy-to-clean alternative.
- Custom Slopes: Ramp-style or sloped trough sinks drain efficiently while requiring less vertical depth inside the vanity cabinet below.
- Maintenance: With zero seams between the basin and countertop, wiping down the surface is quick and hygienic.
14. Add Under-Cabinet Toe-Kick Lighting
Concealed low-voltage LED strip lights mounted underneath floating vanities project a soft wash of light across the floor tile.
- Visual Effect: The soft under-cabinet glow makes the vanity appear to float weightlessly while adding optical depth.
- Nightlight Function: Pair toe-kick lighting with a motion sensor or a separate switch for safe, glare-free night visits.
15. Create a Scale-Proportional Feature Wall
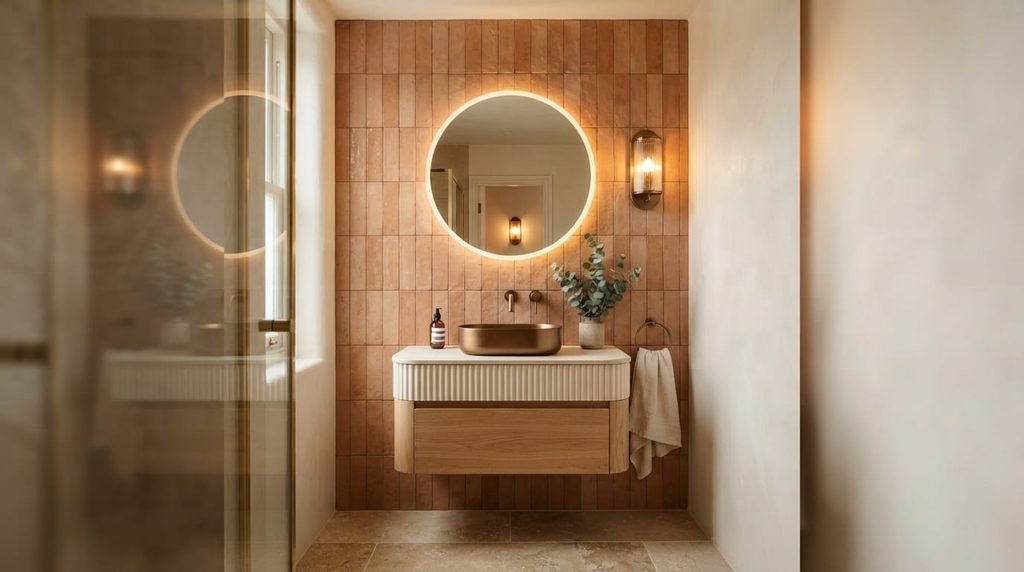
A single feature wall adds personality to a small bathroom without cluttering the floor plan. The secret is selecting materials scaled appropriately for compact spaces.
- Design Ideas: Vertical subway tile, fluted wood panels treated for high humidity, or delicate vertical mosaic tiles.
- Vertical Emphasis: Drawing the eye upward highlights ceiling height, making the room feel taller and more open.
Smart Luxury vs. Standard Remodel: Cost vs. Impact
Knowing where to invest your budget yields the best long-term dividends in daily comfort, durability, and home value.
| Project Area | Standard Approach | Smart Luxury Upgrade | Space & Practical Impact | Estimated Cost Range (USD) |
| Vanity Area | Standard floor cabinet | Floating vanity + in-wall faucet | Opens visible floor; saves 5 inches of counter depth | $600 – $2,200 |
| Toilet | Two-piece floor toilet | Wall-hung toilet with hidden tank | Saves 8–10 inches of floor space; easy to clean | $800 – $2,000 |
| Shower Zone | Raised curb + curtain | Curbless entry + frameless glass | Eliminates visual breaks for an open, airy feel | $1,500 – $4,500 |
| Storage | External tower/shelving | Recessed wall niches | Adds storage with zero footprint impact | $300 – $1,200 |
| Lighting | Single dome ceiling light | 3-tier lighting plan + LED mirror | Eliminates shadows; adds depth and warmth | $400 – $1,500 |
Budget-Friendly Small Bathroom Remodel Strategies
You do not need a massive budget to achieve an upscale aesthetic. By strategically allocating funds toward high-impact touchpoints and opting for cost-effective alternatives elsewhere, you can deliver a luxurious result on a budget.
Strategic Spend vs. Smart Savings
- Where to Spend: Invest in high-use touchpoints like heavy brass plumbing valves, custom glass hardware, and quality dimmable light fixtures. These elements establish the tactile quality of the space.
- Where to Save: Choose high-definition porcelain tile over expensive natural marble. Modern porcelain replicates marble or travertine beautifully while offering superior stain and moisture resistance at a lower price point.
- Paint Selection: Tile wet areas like the shower, but use high-grade moisture-resistant satin paint on non-shower walls to control tile and installation costs.
Technical & Mechanical Considerations
Beyond surface cosmetics, small bathroom renovations must address critical mechanical systems to ensure long-term performance:
- Ventilation Sizing: Compact bathrooms trap humidity quickly, leading to mold growth and wood swelling. Install an exhaust fan rated for at least 1 CFM per square foot of room area, selecting a quiet unit rated under 1.0 sone ducted directly outdoors.
- Plumbing Stack Evaluation: Moving drains or soil stacks in concrete slab foundations can significantly increase labor costs. Keeping the main toilet drain in its original location while updating fixtures overhead delivers high visual impact while controlling expenses.
- Electrical Code Compliance: Ensure all outlets near water sources are GFCI-protected and placed safely outside shower wet zones per local electrical codes.
Common Layout Mistakes to Avoid
- Over-Sizing the Vanity: Installing a vanity that blocks door trim or restricts entry clearance makes the entire room feel cramped. Always prioritize comfortable walkthrough space over counter width.
- Skimping on Waterproofing: Skipping continuous waterproofing membranes (such as Schluter-KERDI or liquid waterproofing) behind shower tiles can lead to hidden rot and moisture damage inside wall cavities.
- Using Inward-Swinging Shower Doors: In tight layouts, a swinging shower door can hit the toilet or vanity. Choose sliding glass panels or a fixed glass screen instead.
Frequently Asked Questions
What is the best color for a small bathroom renovation?
Monochromatic, light-toned palettes such as warm off-whites, greiges, and soft greys—reflect light effectively and prevent visual breaks. However, deep charcoal or dark green can also work exceptionally well when paired with bright white fixtures and layered warm lighting to create an intentional, cozy jewel-box feel.
How much does a small bathroom renovation cost on average?
In the US, a complete small bathroom renovation typically ranges from $6,500 to $18,000, depending on labor costs, material choices, and whether plumbing locations are shifted. Keeping existing plumbing lines in place helps keep overall costs toward the lower end of that spectrum.
Can you put a walk-in shower in a 5×7 small bathroom?
Yes. A standard 5×7 foot layout (35 square feet) comfortably fits a 30×60-inch walk-in shower along the back wall, leaving sufficient clearance for a toilet and floating vanity along the adjacent wall.
How do I add storage without cluttering a tiny bathroom?
Focus on recessed vertical storage. Utilize wall stud cavities for recessed medicine cabinets, in-shower niches, and built-in wall cabinets. Floating vanities equipped with deep divider drawers also keep countertops clear and organized.
Summary Takeaway
Designing a successful small bathroom renovation comes down to prioritizing physical flow, natural light, and uninterrupted sightlines over bulky traditional fixtures. By implementing floating vanities, frameless glass, continuous flooring, and recessed storage, you can transform an ordinary footprint into a spacious, elegant, and highly functional home retreat.
Related resources: How to Fix Squeaky Floors: 7 Proven Easy fixes · How to Seal Drafty Windows: 11 Simple Proven Fixes
One thought on “15 Small Bathroom Renovation Ideas for Smart Luxury”