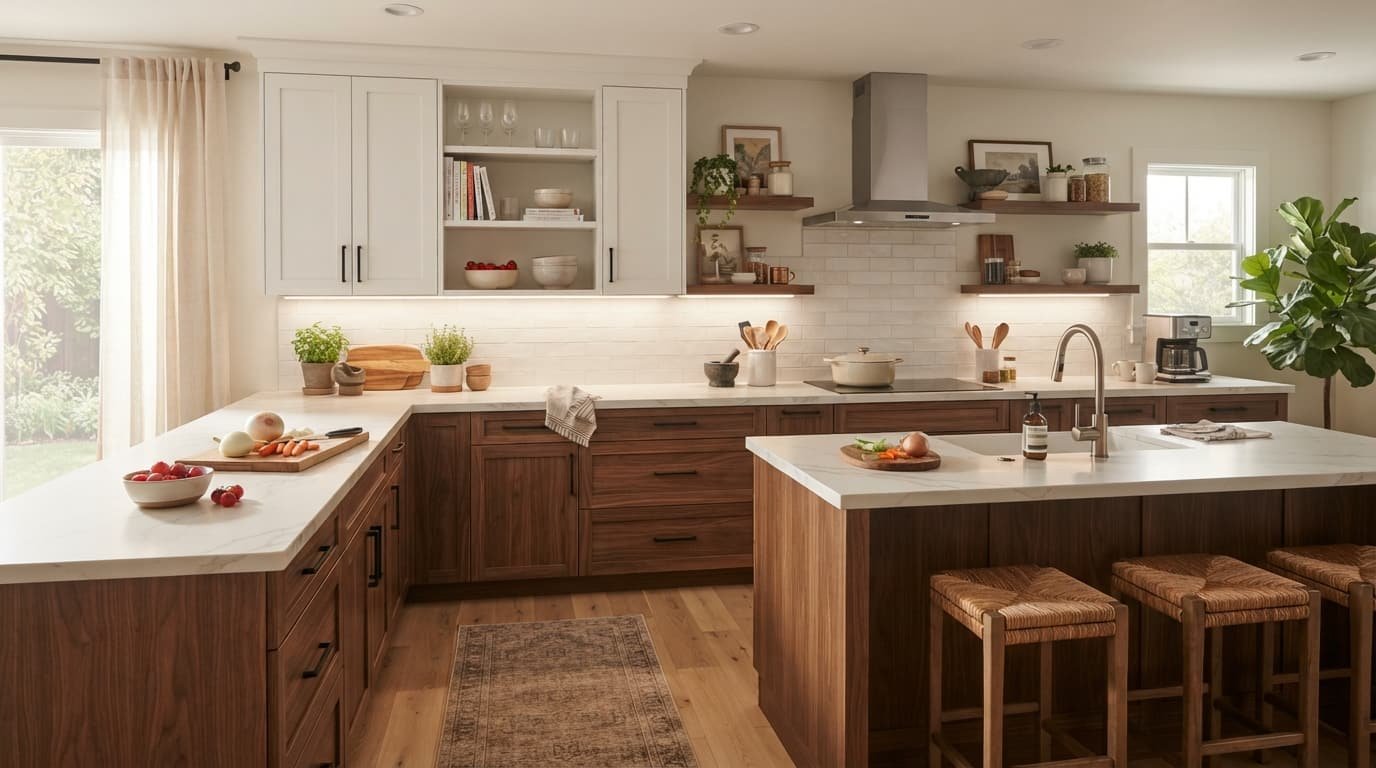
Kitchen under cabinet lighting can make a bigger difference than simply adding another ceiling fixture. When upper cabinets block overhead light, the countertop where you actually chop, mix, cook, and clean can end up in shadow. A well-planned lighting system puts useful light directly over that work area while also adding warmth and depth to the kitchen.
The tricky part is choosing the right type, brightness, color temperature, placement, and controls for your particular kitchen. Before buying anything, use these practical tips to plan a setup that looks good and works well.
The Benefits of Kitchen Under Cabinet Lighting
Under-cabinet lighting adds a layer of light between your ceiling fixtures and countertops. Its main job is to illuminate work surfaces that may be shaded by wall cabinets.
For example, imagine a kitchen with recessed ceiling lights directly above the walkway but slightly behind the person standing at the counter. When you lean over to prepare vegetables, your body can cast a shadow across the cutting area. A properly positioned under-cabinet light can illuminate that same surface from above and reduce the shadow.
It can also improve the appearance of the kitchen. Soft, dimmed lighting along a backsplash can make countertops and cabinet finishes more noticeable in the evening without requiring all the main kitchen lights to be switched on.
The key is to treat it as task lighting first and decorative lighting second. A beautiful glow is useful, but the lighting should still provide enough illumination for everyday kitchen activities.
Select the Appropriate Kitchen Under Cabinet Lighting Type
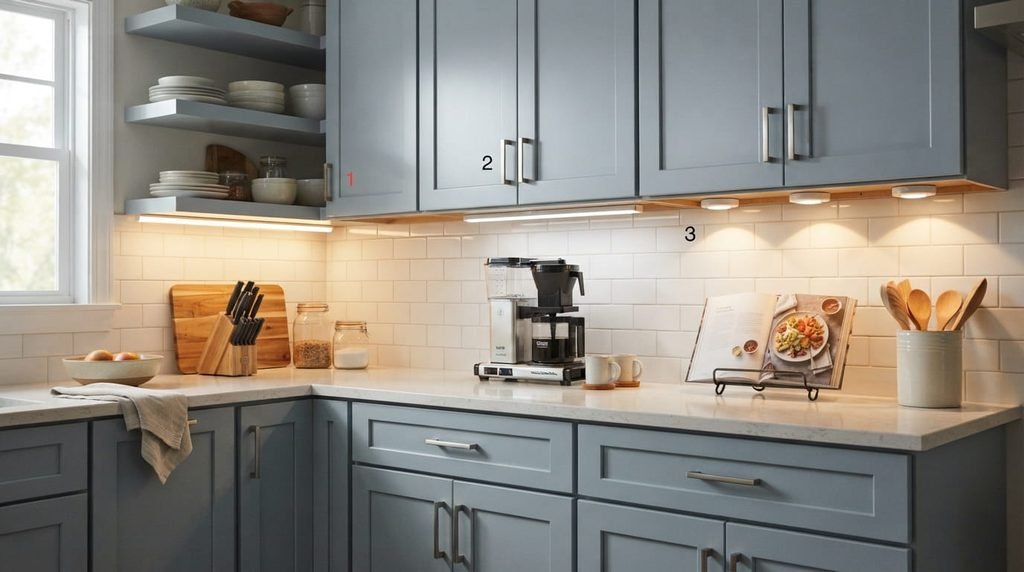
There are three common options to consider: LED strips, LED light bars, and puck lights. The best choice depends on whether you want continuous countertop illumination, a straightforward installation, or small pools of accent light.
LED Strip Lights
LED strips work well when you want a continuous line of illumination across a cabinet run. They can be particularly useful for long countertops because there aren’t large gaps between individual fixtures.
For example, a 10-foot run of upper cabinets can look more consistent with a properly installed strip than with several widely spaced puck lights.
For a cleaner appearance, strips can be installed inside an aluminum channel with a diffuser. This can help soften visible LED points and create a more uniform line of light.
LED Light Bars
Light bars are a practical choice when you want a relatively straightforward installation. They are available in different lengths and can work well beneath individual cabinet sections.
They’re especially convenient when your cabinets have fairly standard widths and you don’t need to create a custom continuous run.
Puck Lights
Puck lights are small, compact fixtures that can be positioned under individual cabinet sections. They can work well for accent lighting or where you want several independent light sources.
However, spacing matters. If individual pucks are too bright or too far apart, they can create noticeable pools of light and darker areas between them.
| Type | Best for | Main benefit | Potential issue |
|---|---|---|---|
| LED strips | Long cabinet runs | Continuous illumination | Requires careful installation |
| LED light bars | Simple installations | Easy to plan | Fixed fixture sizes |
| Puck lights | Small sections and accents | Compact design | Can create hotspots |
Measure Your Cabinets Before Buying
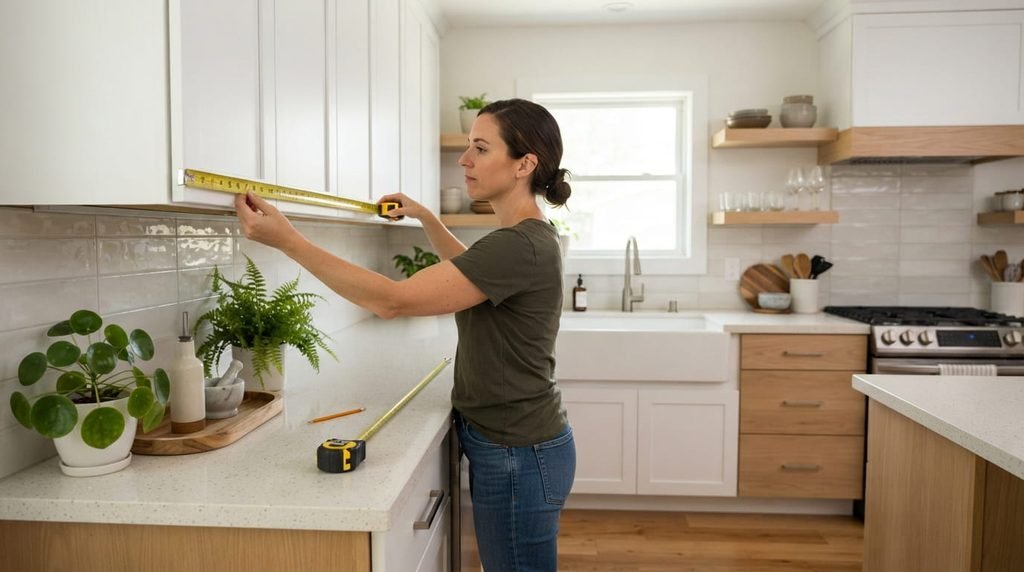
Don’t order lights based only on the overall length of your kitchen. Measure each cabinet section separately.
Start by recording the width and depth of every section where you plan to install lighting. A kitchen might have a 30-inch cabinet next to a 36-inch cabinet, followed by a corner section. Treating the entire run as one measurement can leave you with awkward gaps or unnecessary excess lighting.
Also note:
- Cabinet corners
- Gaps between cabinets
- Range hoods
- Open shelves
- Cabinet depth
- Existing outlets
- Possible locations for drivers or transformers
- Areas where appliances may interfere with the installation
For example, if one cabinet section is interrupted by a range hood, you may need two separate lighting runs rather than one continuous strip.
A simple measurement list can save you from buying the wrong fixture lengths or discovering that your power supply has nowhere convenient to go.
Where Should Kitchen Under Cabinet Lighting Be Installed?
Just as crucial as the light itself is its placement. Installing a bright fixture in the wrong location can still produce poor countertop illumination.
In many kitchens, positioning the light closer to the front portion of the cabinet underside helps direct more useful light toward the countertop work area. If the fixture sits too far toward the backsplash, much of its light may fall on the wall instead.
Think about where you actually stand when preparing food. If you normally work near the front half of a deep countertop, the lighting should be positioned to illuminate that working area rather than simply making the backsplash brighter.
Placement also affects glare. A fixture that is directly visible from normal standing positions can create uncomfortable bright spots. Concealing the light source beneath the cabinet edge or using a diffuser can create a softer appearance.
Corners need additional planning. A continuous strip may need to be cut and connected correctly, while separate light bars or pucks may be simpler around unusual cabinet layouts.
Select the Appropriate Brightness for Under-Cabinet Lighting in the Kitchen
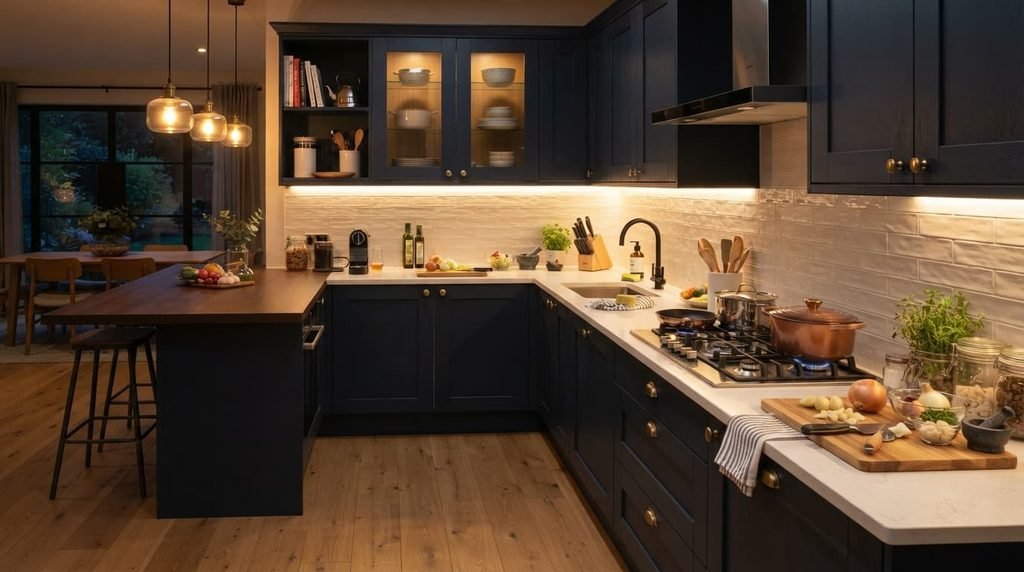
Brightness should be based on more than kitchen size. Countertop color, countertop depth, existing ceiling lights, and the purpose of the lighting all affect how bright the finished space feels.
LED lighting is commonly discussed in lumens, which measure the amount of visible light produced. For strip lighting, you may also see specifications expressed in lumens per foot.
For example, suppose you are planning a 6-foot lighting run rated at 300 lumens per foot:
6 feet × 300 lumens = 1,800 lumens
That’s the theoretical total output of that run based on the stated rating. It doesn’t mean every kitchen needs exactly 1,800 lumens. The actual result will also depend on the fixture design, mounting position, diffuser, countertop, and surrounding lighting.
A dark countertop may need a different approach from a bright white countertop. Likewise, a kitchen that already has strong ceiling and pendant lighting may not need the same under-cabinet output as a kitchen with limited overhead illumination.
Dimming can make the system more flexible. You can use a brighter setting while chopping vegetables and lower it later when you want softer evening lighting.
Pick the Right Color Temperature
Color temperature changes the overall appearance of your kitchen. It is measured in Kelvin (K), with lower numbers generally appearing warmer and higher numbers appearing cooler.
Common choices include:
- 2700K: Warm and cozy
- 3000K: Warm-neutral and comfortable
- 3500K: Balanced appearance
- 4000K: Neutral and clean
- 5000K and above: Cooler, daylight-like appearance
For example, a kitchen with warm wood cabinets and traditional finishes may look comfortable with 2700K or 3000K lighting. A contemporary kitchen with white cabinets and a clean, modern design may suit a more neutral temperature such as 3500K or 4000K.
The most important thing is to consider the lighting you already have. If your ceiling fixtures use a warm color temperature but your under-cabinet lights are noticeably cooler, the two layers can look mismatched.
Before buying, check the specifications of your existing kitchen fixtures if you want the lighting layers to appear coordinated.
Don’t Overlook CRI When Choosing Kitchen Lighting

Brightness isn’t the only specification that matters. Color Rendering Index (CRI) describes how accurately a light source reveals colors compared with a reference light source.
This matters in kitchens because you’re surrounded by different colors and materials. Vegetables, meat, wood cabinets, stone countertops, backsplash tiles, and paint can all look different under different light sources.
A high-CRI light can help colors appear more natural. For a kitchen where accurate color appearance matters, looking for lighting with a CRI of 90 or higher can be a useful starting point.
For example, if you recently installed a backsplash with subtle warm and cool tones, poor color rendering can make those details appear less accurate than they do under better-quality lighting.
Don’t choose a fixture solely because it has a high lumen number. Brightness and color quality solve different problems.
Decide How You Want to Control the Lights
Think about how you’ll use the lighting before deciding how to control it.
Wall Switch
A wall switch is simple and familiar. It makes sense for permanent installations, particularly when the lighting is being installed during a kitchen remodel.
Dimmer
A dimmer gives you more flexibility. You can use a brighter setting while preparing food and reduce the output when you want a softer atmosphere.
Make sure the LED fixture, driver, and dimmer are compatible. Not every LED setup works correctly with every dimming system.
Touch or Remote Controls
These can be convenient for retrofit installations where running new wiring isn’t practical.
Smart Controls
Smart-compatible lighting can provide app, scheduling, or voice-control options when the system supports them.
Motion Sensors
Motion activation can be useful for nighttime trips to the kitchen or for hands-free operation, although sensor placement and sensitivity should be considered before installation.
The right control is ultimately the one that fits how you actually use the kitchen. A complicated control system isn’t necessarily useful if you only need the lights on and off.
Hardwired, Plug-In, or Rechargeable?
Your installation method should match the condition of your kitchen.
Hardwired Lighting
Hardwired systems can create a clean, permanent installation and are particularly suitable during a remodel or new construction.
Because electrical work can involve local requirements and safety considerations, homeowners should use a qualified electrician when the installation involves work that they aren’t equipped or authorized to perform.
Plug-In Lighting
Plug-in fixtures can be practical when your kitchen is already finished and you don’t want to open walls.
The main challenge is hiding the cord. Plan the cable route before mounting the fixture so the finished installation doesn’t leave a noticeable wire hanging beneath the cabinets.
Rechargeable Lighting
Rechargeable fixtures can be useful for renters, temporary installations, or cabinet sections where getting power is difficult.
The tradeoff is that batteries need to be recharged or replaced, and the available brightness and operating time vary by product.
For example, a renter may prefer a rechargeable puck light rather than making permanent electrical changes, while a homeowner already remodeling the kitchen may prefer a hardwired system.
How to Prevent Glare and LED Hotspots
A lighting installation can be bright enough and still look uncomfortable. One common problem is glare from exposed LEDs.
Some strip lights contain closely spaced individual LED points. When those points are visible, they can create a dotted or “hotspot” appearance rather than a smooth line of light.
This becomes especially noticeable when the countertop or backsplash has a glossy surface. Light can reflect directly into your eyes or create distracting bright patterns.
A diffuser can help soften these points. Aluminum channels can also provide a cleaner installation and help protect the strip.
Placement matters too. If you can see the light source easily while standing at the counter, consider whether moving it slightly or adding diffusion would create a more comfortable result.
The goal is not just to produce more light. It is to distribute the light where you need it without creating unnecessary glare.
Common Kitchen Under Cabinet Lighting Mistakes to Avoid
1. Installing the Light Too Far Toward the Backsplash
A fixture mounted too far back may brighten the wall while leaving the front portion of the countertop less illuminated.
2. Choosing Brightness Without Considering the Countertop
The same fixture can look different on a dark countertop than on a light one. Consider the surface and the existing kitchen lighting before choosing output.
3. Ignoring CRI
A very bright fixture isn’t automatically a high-quality lighting choice. If accurate colors matter, check the CRI specification.
4. Mixing Dramatically Different Color Temperatures
A warm ceiling fixture combined with very cool under-cabinet lighting can make the kitchen look visually inconsistent.
5. Creating Visible Hotspots
Individual bright points can be distracting, especially on glossy surfaces. Consider spacing, fixture type, and diffusion.
6. Forgetting About Wires and Power Supplies
Don’t leave cable management until the final step. Decide where the power supply, driver, or transformer will go before installation.
7. Choosing an Incompatible Dimmer
Check compatibility between the LED fixture, driver, and control system before purchasing.
8. Treating Every Cabinet Section the Same
A sink area, corner cabinet, range hood, and open shelf may have different lighting requirements. Plan the kitchen section by section rather than assuming one solution will work everywhere.
Kitchen Under Cabinet Lighting Checklist Before You Buy
Before placing an order, work through this checklist:
- ☐ Measure every cabinet section
- ☐ Decide whether you need task, accent, or both types of lighting
- ☐ Choose between strips, bars, and puck lights
- ☐ Estimate the required brightness
- ☐ Select a color temperature
- ☐ Check CRI
- ☐ Decide whether you need dimming
- ☐ Choose wall, touch, remote, smart, or motion control
- ☐ Decide between hardwired, plug-in, and rechargeable
- ☐ Plan cable routing
- ☐ Check power-supply requirements
- ☐ Consider glare and LED hotspots
- ☐ Check compatibility between components
- ☐ Plan around corners, sinks, appliances, and range hoods
Taking a few minutes to check these details can prevent common installation problems and make the finished lighting look much more intentional.
Frequently Asked Questions
What is the best type of lighting for under kitchen cabinets?
It depends on the intended use. LED strips are useful for continuous illumination across longer cabinet runs, light bars can simplify straightforward installations, and puck lights can work well for smaller sections or accent lighting.
What color temperature is best for kitchen under cabinet lighting?
There isn’t one temperature that works for every kitchen. Around 2700K to 3000K generally produces a warmer appearance, while 3500K to 4000K provides a more neutral look. The existing kitchen lighting and finishes should also influence your choice.
How bright should under-cabinet kitchen lights be?
The appropriate brightness depends on countertop color, depth, existing lighting, fixture efficiency, and whether the lights are primarily for task or accent use. Check the fixture’s lumen output rather than judging brightness by wattage alone.
Should under-cabinet lights be installed at the front or back?
Placement should direct useful light onto the countertop work area while minimizing glare. Mounting too far toward the backsplash can leave the front of a deep countertop less illuminated.
Is 3000K or 4000K better for a kitchen?
3000K gives a warmer appearance, while 4000K looks more neutral and cooler. The better match depends on your cabinets, countertops, backsplash, and existing kitchen fixtures.
Can you install under-cabinet lighting without hardwiring?
Yes. Plug-in and rechargeable options can work well when you don’t want to modify finished walls or cabinets. They’re particularly useful for renters and retrofit projects.
Do under-cabinet lights need a diffuser?
Not always, but a diffuser can help reduce visible LED hotspots and soften glare. It can be particularly useful with strip lights installed where the LEDs would otherwise be directly visible.
Final Thoughts
Good kitchen under cabinet lighting is less about buying the brightest fixture and more about planning how the light will work in your actual kitchen.
Measure each cabinet section, decide what the lighting needs to accomplish, then consider placement, brightness, color temperature, CRI, controls, and installation method. Pay particular attention to glare and wire management because small planning mistakes can become very noticeable once the lights are installed.
When those details are handled together, under-cabinet lighting can make everyday countertop tasks easier while giving the kitchen a more comfortable, finished look.
Related resources: 10 Best KitchenAid Appliances: Smarter Choice · Kitchen Upgrading Tips Mintpaldecor: 21 Smart Ideas